CKA [Installation] – Ubuntu 从0架设,安装CNI 和 kube-apiserver的权限设定
Kubenetes cluster需要安装CNI 否则多台worker node无法互相沟通。
1. 我们需要去到container network plugin 寻找最新版本的plugin
https://github.com/containernetworking/plugins/releases
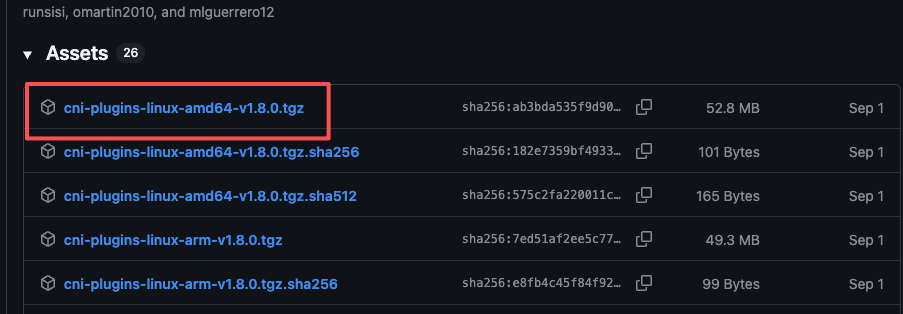
2. 【WorkerNode】去到tmp目录下载CNI插件
cd /tmpwget https://github.com/containernetworking/plugins/releases/download/v1.8.0/cni-plugins-linux-amd64-v1.8.0.tgz3. 【WorkerNode】创建基础目录
mkdir -p \
  /etc/cni/net.d \
  /opt/cni/bin \
  /var/run/kubernetes
4. 【WorkerNode】移动CNI Tar文件和进行解压
mv cni-plugins-linux-amd64-v1.8.0.tgz /opt/cni/bincd /opt/cni/bintar -xzvf cni-plugins-linux-amd64-v1.8.0.tgz5. 【MasterNode】架设Calico
kubectl create -f https://raw.githubusercontent.com/projectcalico/calico/v3.30.3/manifests/tigera-operator.yamlkubectl create -f https://raw.githubusercontent.com/projectcalico/calico/v3.30.3/manifests/custom-resources.yaml6. 【MasterNode】等待3-5分钟,使用这个命令就能在MasterNode看到WorkerNode的status是Ready的
kubectl get nodes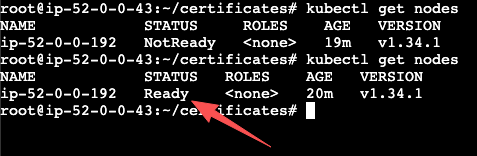
如果等了5分钟status还不是Ready的话,那么就需要在WorkerNode重启kubelet了
systemctl restart kubelet✅ 进行测试 (MasterNode)
1. 创建一个pod跑nginx
kubectl run nginx --image=nginx2. 查看这个pod是否运行在WorkerNode
kubectl describe pod nginx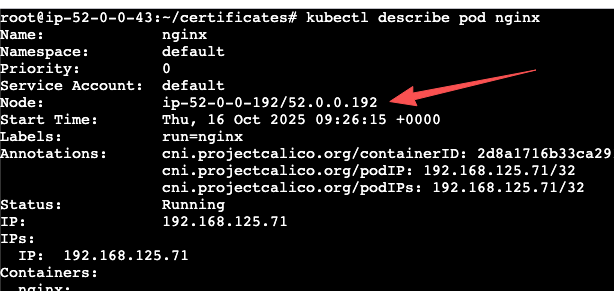
以上的截图这个Pod是运行在我的WorkerNode的,由于我的是使用AWS EC2 ,所以这个IP是Private IP。
- ip-52-0-0-192 这是hostname
- 52.0.0.192 这是EC2的Private IP

我直接ping WorkerNode 的 hostname是ping得到的,代表着没有连接问题。
3. 接下来的测试就是直接进入Pod的内部看看能不能。
kubectl exec -it nginx -- bash
会显示这个结果代表着是权限不足的问题,导致了在MasterNode 无法直接进入Pod内。
一开始kubectl是能够进入了kube-apiserver, 但是由于kube-apiserver 没有权限,所以从kube-apiserver无法连接到kubelet 从而无法进入pod, 所以我们接下来需要把权限ClusterRoleBinding在kube-apiserver上。
【执行流程图】
kubectl  →  kube-apiserver  →  kubelet  →  Pod
4. 创建ClusterRole 定义好权限
cat <<EOF | kubectl apply -f -
apiVersion: rbac.authorization.k8s.io/v1
kind: ClusterRole
metadata:
  annotations:
    rbac.authorization.kubernetes.io/autoupdate: "true"
  labels:
    kubernetes.io/bootstrapping: rbac-defaults
  name: system:kube-apiserver-to-kubelet
rules:
  - apiGroups:
      - ""
    resources:
      - nodes/proxy
      - nodes/stats
      - nodes/log
      - nodes/spec
      - nodes/metrics
    verbs:
      - "*"
EOF
5. 把创建好的权限,使用ClusterRoleBinding绑定到kube-apiserver上
cat <<EOF | kubectl apply -f -
apiVersion: rbac.authorization.k8s.io/v1
kind: ClusterRoleBinding
metadata:
  name: system:kube-apiserver
  namespace: ""
roleRef:
  apiGroup: rbac.authorization.k8s.io
  kind: ClusterRole
  name: system:kube-apiserver-to-kubelet
subjects:
  - apiGroup: rbac.authorization.k8s.io
    kind: User
    name: kube-apiserver
EOF
6. 重复再尝试执行这个命令就能进入到Pod的内部了
kubectl exec -it nginx -- bash ![]()